Written by Hannah Sarradet, Staff Accountant at Massey Consulting
We all know that there can be some complexities within Sage Intacct. Here are 3 tricks to know that will make your Sage Intacct customer experience
1. Pay attention to detail on data imports:
Sage Intacct uses very specific Excel templates for uploading master records. I have learned many times that even the tiniest thing can keep your data from importing, so beware of this. I have also experienced the frustration that comes along with repeatedly trying to upload the same file and having no idea what’s wrong or what’s causing it to fail. So, to avoid this situation, it’s best to learn about frequent mistakes before trying to import. Here are some suggestions to avoid common pitfalls that users may experience.
- Make sure your template is in CSV file format. Sage Intacct will ONLY import CSVs.
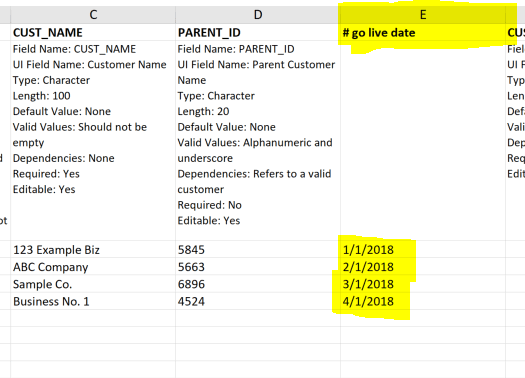
- Make sure there are no “#” signs hidden in the document. This symbol is not recognized by the system, and any pound sign inside a file will cause the whole row or column not to import. However, this feature makes it possible to record your own notes inside of a template that doesn’t have to import to Sage Intacct.

- Make sure to follow the “valid values” guidelines at the top of each field, or the system will reject the entry. It is also a good idea to look at the default values and dependencies for reference.

There are many others to keep in mind, and it’s always best to stick to best practices when uploading master data.
2. Setting up Users and Assigning Roles
One of the first things you will do when your company implements Sage Intacct is assign which employees will use the system, and what all each user will be able to do. This is done by setting up roles and assigning permissions to each role inside your instance of Sage Intacct.
Sage Intacct allows each company to decide whether they want users to be assigned permissions on a user basis or role basis. This can be accomplished simply by choosing either option on the company configuration screen (see picture below).

The difference here is that a user-basis system will assign different permissions to each individual employee using Sage Intacct, whereas a role-basis system will assign predetermined permissions based on a given role.
As a general rule, we tend to see that it’s almost always best to go with role-based permissions. Assigning each individual user a unique set of permissions can prove to be a pain, not to mention time-consuming. So, unless your company has a specific need for this, we recommend always going with role-based.
3. Master Records Formatting
I have learned quite a few things about how to make the input of master data in Sage Intacct a little easier as well.
The number one thing: Formatting is important.
This applies to things like number sequencing, naming, etc. With these entries, consistency is key. I have found it’s less important to have any specific type of formatting and more important that everything is kept uniform throughout all records. I never want to jumble through a huge list where nothing looks like it goes together. It’s not only visually unappealing but can cause a slowdown in finding what you need.
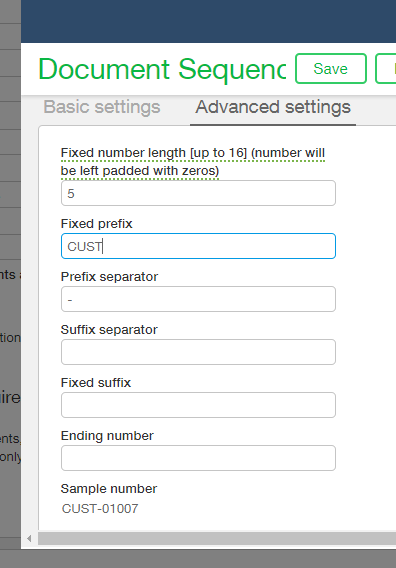
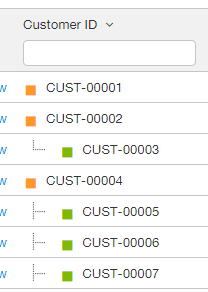
Luckily, Sage Intacct has some helpful features to make this possible. For example, I always take advantage of the auto-numbering feature when setting up a client’s records. This allows every customer, vendor, employee, etc. to have their own identifier number automatically assigned when they are put in the system while allowing you to choose the unique format you want.


Formatting tricks like this will help keep your records organized and easy to work with. For more Sage Intacct shortcuts, visit this blog from MicroAccounting to help keep your user experience a breeze.
You can also check out our “Training and Development” blog to discover where you can get the best resources or guidance regarding your software solution.


