
Written by Barbara Raess, Sage Intacct Consultant at Massey Consulting
Lists inside of Sage Intacct provide a means of viewing aspects like records, transactions, or other information in list format. For example, you can have a list of customers or a list of bills. Most list pages display a default set of columns that are sorted alphanumerically, like displaying customers in order based on Customer ID.
Sage Intacct provides tools for you to sort, filter, and even create views that display only those list items of importance to you.
Here are a few best practices on using lists inside of Sage Intacct
A. Sort and filter a list to quickly find what you’re looking for.
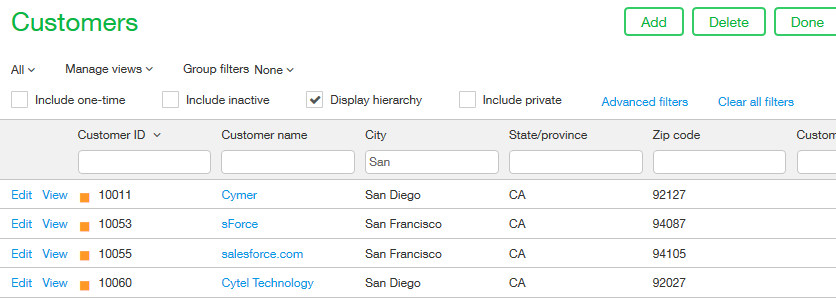
- In the text field above the column that contains the value, enter a value. For example, if the value begins with “San” type San to include records with a value for this column of San Jose, San Francisco, Santa Fe, and so on.
- Click Go beside the field. The system displays only those list items that match the text you entered.
Example of Customer list with City names beginning with “San”:
B. Use Advanced filters to enable you to apply standard operators to columns
- Click on the Advanced filters
- Add the Column to be used filtered from the dropdown list
- Add the operator for your filter from the dropdown list
- Add the criteria for your list
- Click Apply (see below)
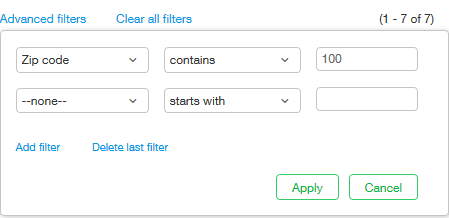
Example Customers list filtered by zip codes containing “100”:

C. Add a custom view
If standard views are insufficient for displaying the list items and values that you need to see, you can create a custom view. A custom view can be based on a standard view or another custom view, or you can create a completely new custom view.
1. To add a new custom view:
- Under Manage views, click Create New View.
- The Create New View wizard appears.
- Follow the wizard steps
- Save
Wizard Step |
Description |
| Select columns | Select columns to be included or excluded in the view. |
| Select column sequence |
|
| Select filters | Set filter values as follows:
If the column being filtered is a checkbox field, set the operator to Equals and the value to True or False. |
| Sort results |
|
| Describe your view |
After a view is named, you can’t rename it.
|
2. To edit a Custom View
- Click the down arrow next to ALL
- Select the custom view you would like to change
- Under Manage views, click Edit.
- The Edit View wizard appears.
- Make changes as needed
- Save
To learn more Sage Intacct best practices, stay up to date on our calendar page, featuring monthly CloudBytes webinars on useful tips and tricks for Sage Intacct users.